Getting clean, professional embroidery on Tajima machines starts with accurate Image to PXF File Conversion. If your image isn’t converted properly, you’ll face problems like broken stitches, distorted shapes, or uneven fills. PXF files are designed to hold detailed stitch data, making them ideal for Tajima embroidery machines when digitized correctly. In this guide, I’ll walk you through the full process in a simple, casual, and practical way so you understand how to get high-quality results every time.
What Is a PXF File in Embroidery?
A PXF file is an embroidery format that stores advanced stitch information, including stitch type, direction, density, and color sequencing. Unlike basic stitch files, PXF allows for detailed editing and fine control, which is especially useful for professional Tajima embroidery machines.
This makes PXF files a favorite among digitizers who want flexibility and precision before final production.
Why Tajima Machines Prefer Proper PXF Conversion
Tajima machines are known for speed, accuracy, and consistency but they rely heavily on clean digitized files. Poorly converted images can cause:
- Thread breaks
- Misaligned stitches
- Fabric puckering
- Inconsistent stitch density
A properly converted PXF file ensures your Tajima machine runs smoothly and delivers sharp, professional embroidery.
Types of Images Used for PXF Conversion
Before conversion begins, the quality and format of your image matter a lot.
Vector Images
Formats like AI, EPS, and SVG are ideal because they maintain sharp edges and clean lines when scaled.
Raster Images
Files like JPG, PNG, or BMP can still be converted, but they often need manual cleanup to remove noise, blurry edges, and unnecessary details.
The cleaner the image, the better the embroidery outcome.
Step-by-Step Image to PXF File Conversion Process
Let’s break down the conversion process into easy steps.
Clean and Prepare the Image
Start by removing backgrounds, fixing rough edges, and simplifying complex details that won’t stitch well.
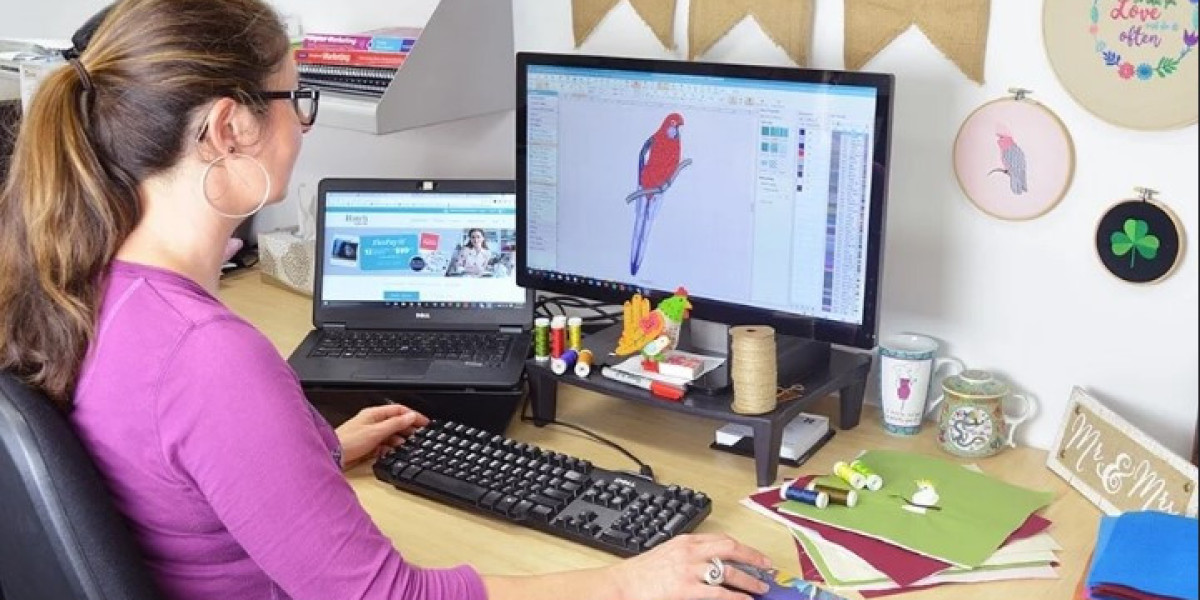
Select Professional Digitizing Software
To create PXF files, you’ll need embroidery digitizing software such as:
- Wilcom
- Pulse
- Tajima DG/ML
- Hatch Embroidery
These tools allow you to manually control stitch properties.
Define Stitch Types
Different elements need different stitches:
- Satin stitches for lettering and borders
- Fill stitches for large areas
- Running stitches for fine outlines
Using the right stitch type prevents distortion and improves durability.
Adjust Stitch Density and Underlay
Density affects how tight stitches are. Proper underlay stitches help stabilize the fabric and improve stitch coverage.
Set Stitch Direction Carefully
Stitch direction impacts texture and appearance. Consistent direction reduces fabric pull and improves overall design flow.
Export as a PXF File
Once digitizing is complete, export the design as a PXF file optimized for Tajima machines.
Common Mistakes to Avoid in PXF Conversion
Even small errors can affect embroidery quality. Avoid these common mistakes:
Overusing Auto-Digitizing
Auto-digitizing can save time, but it often produces uneven stitches and poor pathing.
Ignoring Fabric Type
Different fabrics require different settings. What works for cotton may fail on caps or stretch materials.
Using Excessive Stitch Density
Overly dense stitches lead to thread breaks and stiff designs.
Skipping Test Stitches
Always test the design before full production to catch errors early.
Best Practices for High-Quality PXF Files
Follow these tips for consistent results:
- Use high-resolution or vector images
- Digitize manually for complex designs
- Match stitch density to fabric type
- Keep stitch lengths consistent
- Always run test embroidery
These best practices help maintain quality across all embroidery jobs.
PXF vs Other Embroidery File Formats
Here’s how PXF compares to other common formats:
Format | Machine Compatibility | Editing Flexibility |
PXF | Tajima | High |
DST | Tajima, others | Limited |
PES | Brother/Babylock | Moderate |
EXP | Melco/Bernina | Low |
PXF stands out because it allows more detailed editing before final production.
When to Outsource Image to PXF Conversion
If you’re handling complex logos, tight deadlines, or large volumes, outsourcing can save time and ensure accuracy. Professional digitizers bring experience, advanced software, and fabric-specific expertise to every design.
Outsourcing also reduces machine downtime and material waste.
Final Thoughts
Mastering image conversion is key to professional embroidery, and Image to PXF File Conversion plays a major role in achieving clean results on Tajima embroidery machines. With proper preparation, correct stitch settings, and careful testing, you can achieve embroidery that looks sharp and runs smoothly.
For businesses that want reliable, production-ready PXF files without the hassle, many embroiderers trust Digitizing Buddy for accurate digitizing, smooth stitch flow, and consistent embroidery quality.