"A Rising Tide" in the Shrouded Sky update isn't hard because the enemies hit harder; it's hard because the map keeps trying to trick your sense of direction. You're bouncing between levels, ledges, and half-broken shortcuts, and if you don't respect the vertical routes you'll waste a whole run. If you're stocking up for attempts, having resources like ARC Raiders Coins in mind can take a bit of pressure off, because this quest loves chewing through ammo, meds, and time.
Buried City: Getting Into the Foreman's Place
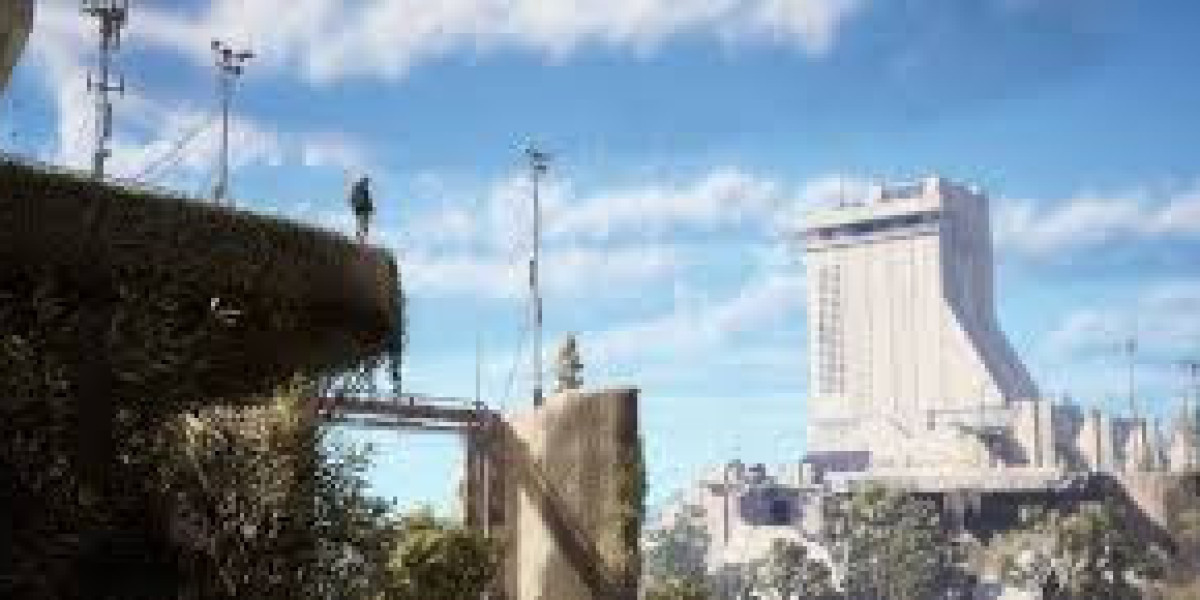
Start in Buried City and head just south of Piazza Roma, where the foreman's apartment sits behind a "nope" of barricades. Don't bother looking for a clean front entrance. It's not happening. What usually works is climbing the nearby buildings, then dropping onto that narrow platform wedged between the apartment blocks. The safer move is slow and steady: hop across roof edges, check your landing, then commit. If you're feeling confident, there's a zipline between rooftops that can save time, but the jump timing is picky, and missing it can turn into a loud scramble. Once you're inside, aim for the desk with the monitor setup and interact with the digital logbook to push the quest forward, then get out and think extraction routes before you're under pressure.
Dam Battlegrounds: Triggering the Next Stage
Queue into Dam Battlegrounds next and make for the Power Generation Complex at the far north. This part's almost weirdly forgiving: you don't need to flip switches or babysit a progress bar. Just entering the POI is enough, so don't overstay trying to "make sure it counted." As soon as it updates, rotate southwest toward the Controlled Access Zone. People love trying the dramatic zipline drop, but it's inconsistent if you're not already lined up. The reliable entry is a plain ladder just outside the complex's southwestern edge. Take it, slide down, and you're suddenly in the hot zone with less exposure than the flashy options.
Clue Hunt: Finding the Reconstruction Notes
The last leg is where runs get messy. You're weaving through industrial walkways, gantries, and machinery that blocks sightlines in all the annoying ways. Move like you're expecting someone around every corner, because you probably should. You're looking for a room with windows overlooking the main floor; it's the kind of space you might ignore because it feels like set dressing. Inside, there's a whiteboard covered in scribbles about the reconstruction project. Interact with it like you're snapping evidence, and that's your completion tick. After that, don't get greedy—plot a quiet exit, watch for third parties, and keep your stamina for the sprint, not the sightseeing.
Worth the Risk: Rewards and Run Prep
The payoff is solid—good-quality gear and ammo that actually matter once the update starts throwing nastier objectives at you. Still, the real "reward" is learning the map's vertical habits, because that knowledge carries into every other mission. If you want to smooth out repeat attempts, treat your loadout like it's disposable and plan for one mistake per run, because it happens. And if you'd rather spend more time playing than farming basics, a storefront like RSVSR that focuses on game currency and items can help you top up supplies without turning your evening into a grind.